July 24, 2018
Softorino YouTube Converter 2 Converts Video From Popular Sources
 Icon
Icon
Product: YouTube Converter 2 | Softorino
Price: $19.99
I like single task utilities. These are the utilities which set out to perform a single task and do it well. YouTube Converter 2 from Softorino is one of those utilities.
 Video Sources
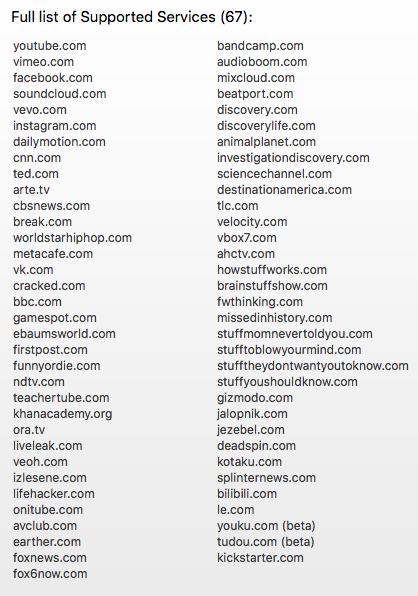
It is misnamed. The most popular task it performs is converting YouTube videos for your macOS and iOS devices, but it converts video from more than sixty other popular sources. It downloads videos, music and ringtones from these sources and makes them available to you on the computer or on your iOS devices.
Video Conversion
 YouTube Converter 2 Interface
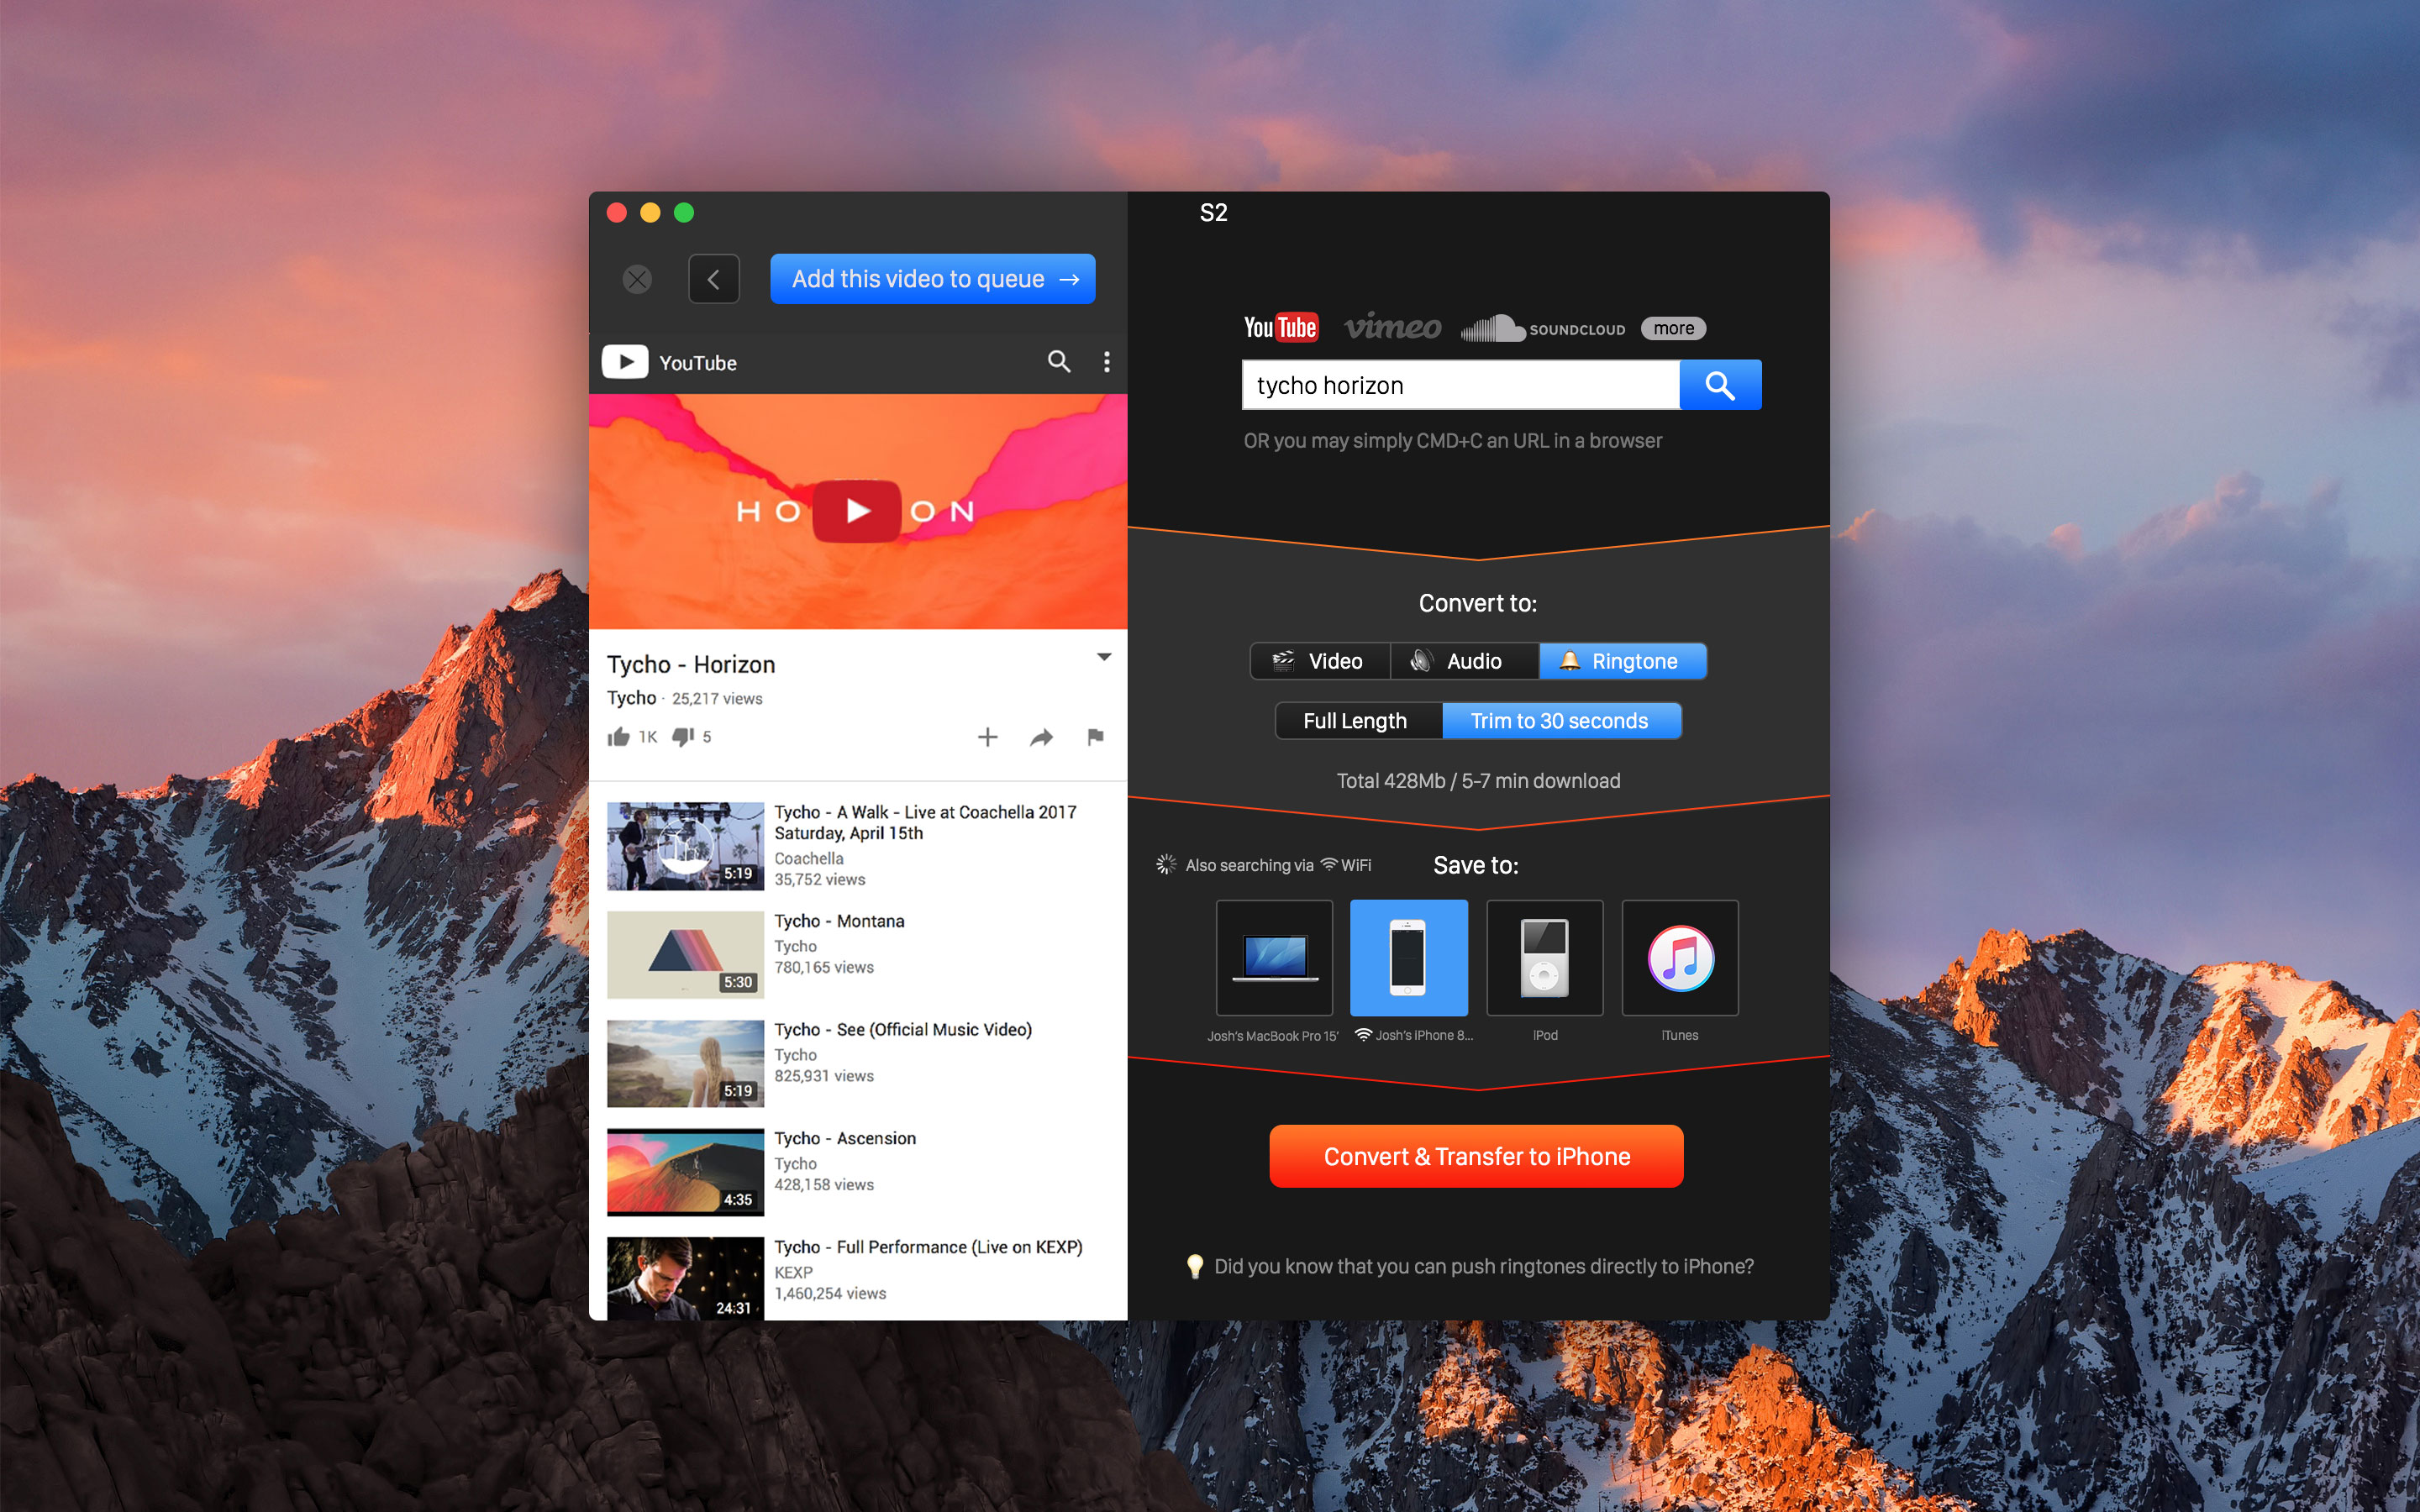
YouTube Converter 2 converts the source video into a choice of different resolutions for you. 2160p to 360p is supported and you get to just click a few buttons and get the video you want on any device you want.
Conversion to Audio
 Audio
Audio
You can take any video and convert it into audio. A choice of formats is available to you on the conversion. MP3, AAC are useful formats for this.
Conversion to Ringtones
 Ringtones
This is a much desired feature. You can convert a video into Ringtones for your iPhone, transfer it to the iPhone and use it for your incoming phone calls. All by clicking a few buttons. The length of the ringtone can be adjusted to be the usual 30 second ringtone.
Conclusion
YouTube Converter 2 is an utility which does what it is supposed to in an intuitive and efficient manner. If you need to download videos or download videos converted to audio or ringtones this is a product which performs those tasks efficiently.
I am happy with the product. It is recommended heartily.
A license was provided by the developer for review.
macosxguru at the gmail thingie
Other Reviews of the Product:
Softorino YouTube Converter 2 review: The most convenient way to download website videos and transfer them to iOS devices | Macworld
Softorino YouTube Converter 2 Makes Downloading Streaming Video Effortless – MacStories
YouTube
Ringtones
Video
July 4, 2018
 Keep It Icon
You Gotta Keep It, Keep It
Product: Keep It
Price: $49.99
Keep It belongs to the category of products I call a “Digital Dump”. Like Evernote, this is the repository of files that you want to keep around and search periodically to reach the pebbles of wisdom that are contained in them. On macOS, the primary products in this space are:
- DEVONthink
- Yojimbo
- EagleFiler
- Keep It
I use DEVONthink Pro Office for my digital dump. I am going to write about it soon. In this article, I am going to talk about Keep It. Keep It launched version 1.4 with the ability to deal with Markdown and that is what I am going to focus on.
Digital Dump
Keep It is an efficient digital dump.
Let’s break this up into the things you expect from a digital dump and see how well Keep It does them.
Collecting
In a digital dump, you collect notes, links and the wide category of everything else.
 Default Note
Keep It takes notes in plain text, rich text and Markdown. You have the option of setting a default format for your notes. Notes have the ability to contain the usual elements: checklists, ordered and unordered lists, images, links and other attachments.
 New Note
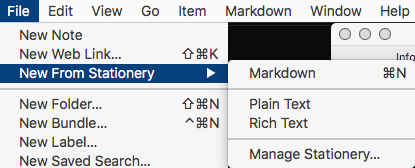
Keep It has an interesting stationery feature which lets you choose the format of the note you are taking.
 Bookmarklet
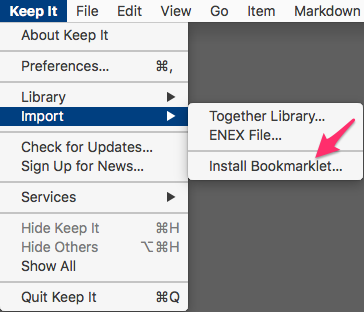
You can save web links to Keep It. You can view them in the app, or open them in the web browser, save them to PDFs or web archives for offline reading. Keep It provides a JavaScript snippet to import a web link for the current page in the browser. If you select some text on the page and press the bookmarklet, Keep It creates a note with the selected text and URL.
You can add any file you want to Keep It or any of its folders. They can be opened in their original applications and through iCloud, changes will be available across all your Macs and iOS devices.
Organizing and Accessing Your Items
A digital dump has to be able to search quickly and efficiently through a plethora of files to locate the document/s you are interested in. Keep It does not disappoint. It provides you several ways of organizing your files and that makes the search function focused and efficient.
In Keep It, you can access thumbnails and summaries for most files, edit your own notes in rich text, plain text and Markdown files. You can add highlights and notes PDFs, show images, web pages and most other documents. Any item, in your Library, can be encrypted with a password.
Keep It can store everything in iCloud and that makes your library accessible across all your Macs and iOS devices (with Keep It for iPad and iPhone).
There are various ways you can decide to store your library in Keep It:
- You can choose to keep all your files in the Library while using tags to put them into categories. Tags are not nested. I prefer the implementation of tags by Bear - Notes. Nested tags would be an improvement over the current implementation in Keep It. Nested folders give you the same feature and thus Keep It forces you to use a mix of folders and tags to attain what in Bear is implemented through nested tags.
- You can choose to organize your items into folders and put the items into discrete folders. You can double click to focus the sidebar on the folder you are working in.
- You can create bundles of things. Items can belong to more than one bundle at a time. When you get rid of the bundles, it doesn’t get rid of the files in it. They remain where they are in your library. It is an interesting way of focusing on a subset of relevant documents and working through your project. Finishing it and getting rid of the organization.
- You can mix and match your organizational scheme with folders and tags and bundles. Keep It is flexible in how it lets you manage your organization of documents.
- You can decide to implement no organization and use the find function to get to files you need.
The reality is that the more documents your Keep It database collects, the more you need some organizational criteria that you are comfortable with to impose some order to it. What method you choose is up to you but you need some method to control the madness which is intrinsic to a digital dump. For me? I like tags. I keep everything tagged and have set up saved searches to provide the organization that I am comfortable in.
 Saved Search
With the introduction of Markdown to Keep It, I decided to see whether I could use it to maintain my writing for Bicycle For Your Mind. I put all the text files into the Library and then tagged them:
BlogToDo: Ideas for blog articles got this tag.BlogWIP: Ideas I am working on got this tag.BlogPosted: Articles which have been posted got this tag.Untagged: I have this saved search to remind me of articles that have not been tagged.
It is a simple system and it works. This is similar to the organization I had in Bear but the implementation is a little different here since I am not able to use nested tags. I have also not in any sense stretched the limits of what can be done in Keep It. I am not using it as the digital dump that it is meant to be. I am much more interested in using this as an organizer of my writing. With its adoption of Markdown, I can use the product to maintain order in my writing and also do the occasional edit of my files. Markdown implementation makes this a possibility.
Markdown Implementation
Keep It’s support of Markdown is a hybrid of CommonMark plus strikethrough. In the editor you can type anything you want. The support of Markdown is designed to be basic and geared towards the preview of Markdown as being something more than plain text.
 Markdown Settings
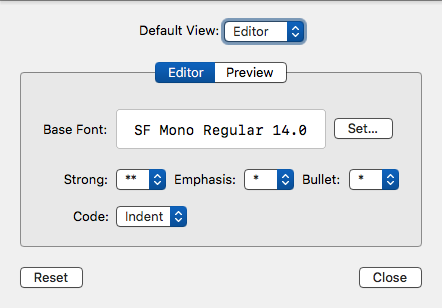
You can set the preferences for the Markdown editor by going to Markdown>Settings.
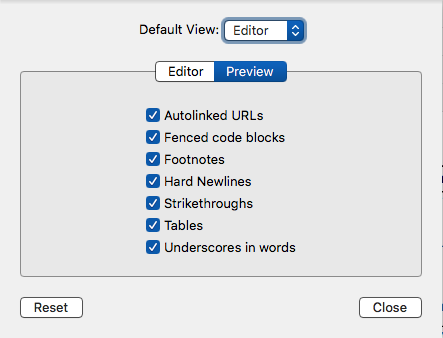 Markdown Preview Settings
The preview pane of Markdown settings shows you what is supported in Keep It.
The good news is that a file in Keep It can be edited in any application you want. Right-click on the file in the Sidebar and you have the option to open the file in your default Markdown editor or any application which the system thinks can handle Markdown files. This feature makes Keep It a manager of files and you can use any editor you want to do the actual writing and editing of the files in Keep It.
Keep It provides you with the ability to write Markdown but it is not a core feature of the product. The core feature is the digital dump nature of the product. The Markdown support is almost an afterthought. If you care about your writing environment and are looking for a product to live and write in, Keep It falls a tad short. Keep It wants you to edit your files in your Markdown editor of choice and doesn’t want to compete with products like Bear and Ulysses. Both of those products perform a subset of functions that Keep It provides with a focus on note-taking for the former and writing for the latter.
My problem with the approach that Keep It takes is that it is such a missed opportunity. If you are going to include Markdown support in a digital dump, let’s take it a step further. Let’s make it a creating environment as well as a collecting one. You are so close. These are some of the steps that would make the product complete:
- Ability to change line-spacing in the editor.
- Typewriter scrolling in full screen mode.
Keep It Files
 Keep It Files
Keep It, like EagleFiler, keeps its files outside a database. There is a database file but the files you add to Keep It are kept in their original format in the Library folder. That is different from Yojimbo or DEVONthink and its various editions. I like having the original files accessible. I can work on those original files in whatever application I choose and Keep It accesses the edited files without a complaint. Makes the process of working on my files easier and I am not stuck to always editing my files in the sub-optimal editing environment of Keep It. Having the original files accessible ensures that I am not stuck with Keep It or its database for continued access to my files. This absence of a lock-in makes the product versatile and useful.
Theming
Keep It uses the same themes as Mou, MacDown, and, LightPaper. It is based on PEG Markdown Highlight. The technical details are not that important. What it means in real terms is that you can adopt or use themes from other programs to come up with usable themes for Keep It.
I like writing in Solarized - Ethan Schoonover and have both a light and dark version to use in Keep It. That makes the Markdown editor usable and comfortable to me.
Usability
Keep It is a mature product with a well-developed system of preferences.
 Preferences>General
You can specify the behavior of Keep It when it opens a new document, or where to open items, where to allow tabs. The behavior of Compact Mode.
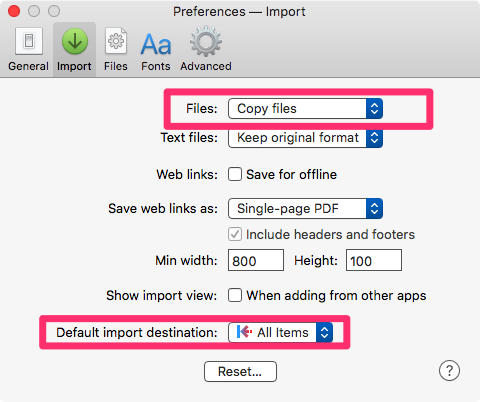 Preferences>Import
You can set the behavior of whether you want to copy or move files when you bring them into Keep It. The default destination of imports can be specified.
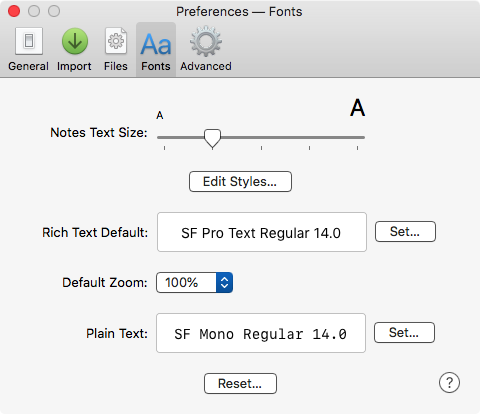 Preferences>Fonts
You can set the default font for Rich Text documents and Plain Text documents. The Preview fonts and text sizes can be set here.
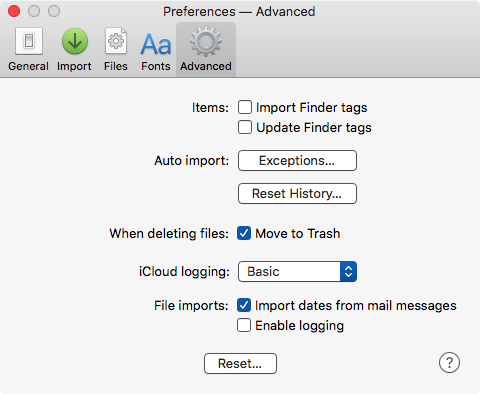 Preferences>Advanced
Some advanced preferences including the nature of iCloud logging can be set in this pane.
One of the many things I like about Keep It is its support for extensive keyboard commands all across the program. Its support for keyboard commands for Markdown editing is exceptional. It is a pleasure to write in this program.
Conclusion
This is a mature product which has been well designed and is feature rich. If you are looking for a Digital Dump, Keep It will not disappoint. And like me, if you are looking for a home to manage your Markdown based writing, Keep It fulfills that function admirably well.
The only thing I would change about Keep It is the implementation of a few features which extend the product to become a better creation tool in addition to its present incarnation of well-designed collecting tool.
Keep It is recommended heartily.
The developer provided me with a license code to review the product.
macosxguru at the gmail thingie
KeepIt
Digital Dump
macOS
June 25, 2018
Useful Keyboard Commands for macOS

Some Keyboard Commands Every Mac User Should Know
These are the basic keyboard commands that you will use a lot.
| Switch between Launched Applications |
⌘+[tab], hold down the ⌘ key and keep pressing [tab] to move from app to app. ⇧⌘ +[tab] to go back through the list of launched apps |
| Quit Applications |
⌘+Q |
| Close a Window |
⌘+W |
| Copy and Paste |
⌘C and ⌘V |
| Cut |
⌘X. Cut puts the selected data in the clipboard. You can paste it to another location if you want. It is different from the delete key, in that when you delete something, it doesn’t get put in the clipboard. |
| Select All Items |
⌘A |
| Find Items |
⌘F |
| Undo and Redo |
⌘Z is Undo. ⇧⌘Z is Redo. |
| Force Quit |
⌥⌘⎋ gives you a list of running apps. Choose the one you want and Force Quit it. [⎋ is the Escape key]. This is useful when an application becomes unresponsive. |
| Move to Trash |
⌘⌫. (⌫ is the delete key). |
| Empty Trash |
⇧⌘⌫. If you want to suppress the “Are you sure?” message use ⇧⌥⌘⌫. |
| Get Info |
⌘I. Choose a file in the Finder and hit ⌘I to get information on it. |
| Preferences |
⌘,. In most applications this will lead you to its preference pane. |
| Spotlight |
⌘␣. That is command and the spacebar. |
| QuickLook |
Select an item in the Finder and press the spacebar. |
| Change Windows |
⇧⌘`. This will switch between open windows in an application. |
| Put Display to Sleep |
⌃⇧(power button) or, ⌃⇧⏏ will put the display to sleep. |
| Log Out of User Account |
⇧⌘Q |
| Log Out of User Account Instantly |
⌥⇧⌘Q |
| Quit All Apps and Restart |
⌃⌘⏏ |
| Quit All Apps and Shutdown |
⌃⌥⌘⏏ |
| Force Restart |
⌃⌘ |
| Take a Screenshot |
⇧⌘3 |
| Take a Screenshot of an Area |
⇧⌘4 |
Keyboard Commands for Dealing With Text
These are useful when you are dealing with text in any macOS application.
| Forward Delete |
⌃D |
| Delete Everything to the Right of the Insertion Point |
⌃K |
| Delete Everything to the Left of the Insertion Point |
⌘⌫ |
| Align Center |
⌘E |
| Align Justified |
⌘J |
| Align Left |
⌘L |
| Align Right |
⌘R |
| Find Dialogue |
⌘F |
| Find and Replace |
⌥⌘F |
| Find Next |
⌘G |
| Find Previous |
⇧⌘G |
| Font Dialog |
⌘T |
| Look up Word in Dictionary |
⌃⌘D |
| Display Spelling and Grammar Window |
⇧⌘: |
| Find Misspelled Words |
⌘; |
Keyboard Commands for Selecting Text
These commands help you in selecting text.
| Select Up to Start of Word From the Insertion Point |
⇧⌥← |
| Select Up to End of Word From the Insertion Point |
⇧⌥→ |
| Select Up to the Start of the Line From the Insertion Point |
⇧⌘← |
| Select Up to the End of the Line From the Insertion Point |
⇧⌘→ |
| Select Up to Start of the Doc From the Insertion Point |
⇧⌘↑ |
| Select Up to End of the Doc From the Insertion Point |
⇧⌘↓ |
Keyboard Commands for Navigating Within Text
These commands are useful for navigating within your text document.
| Go to the Start of the Line Where Your Insertion Point Is |
⌃A |
| Go the End of the Line Where Your Insertion Point Is |
⌃E |
| Go to Start of the Doc |
⌘↑ |
| Go to End of the Doc |
⌘↓ |
| Go to Start of the Line |
⌘← |
| Go to End of the Line |
⌘→ |
| Go to the Beginning of the Word |
⌥← |
| Go to the End of the Word |
⌥→ |
How Does One Learn Keyboard Commands?
People have different ways of learning keyboard commands. Some print them out. Some bookmark them on the browser. Some keep the file open all the time. Some make notes and type them out to try to memorize them.
I choose a subset of commands I want to learn and add them to the beginning of my diary file. I write a diary every day. I access it several times a day. The subset is placed at the top of the diary file. I will have the same subset on the top of my individual diary files every day for a week, sometimes more. When I am convinced that I know the commands, I will introduce a fresh subset of commands to the diary file. I insist on using the keyboard commands I have learned. I refuse to go to the menus. If there is a keyboard command available, I want to learn it. It might require several trips to the master file of keyboard commands to refresh my memory but after a while it will become part of my muscle memory. Yes, it sounds like a lot of work, but the performance gains are substantial. Over time, you become productive with the tools you live in.
macosxguru at the gmail thingie
Keyboard
MacOS
 Bicycle For Your Mind